A project that I hope to get started on in the near future is working on creating a micropub end-point for my blog. There are some good open source starting points, but one of my goals is to use the project as a way to better learn server-side Node.js and/or Nest.js programming. Obviously, I will want a good authentication mechanism in place to protect against abuse of the micropub end-point, once I have one.
I am fairly comfortable using Nginx as a reverse proxy server, and so my initial exploration was a web search on how to add Oauth authentication to a subfolder or subdomain served by an Nginx web server. My search quickly lead to Aaron Pareki's 2018 article Use nginx to Add Authentication to Any Application. That article in turn lead me to the Vouch project.
Create an OAuth Application in Gitea
I run my own Gitea server, and it can act as an OAuth provider. This frees me from having to tie my authentication to a service that I do not fully control, such as GitHub or GitLab. Vouch can be configured to work with Gitea, and provides an example configuration to get one started.
In order to acquire the client_id and client_secret needed for Vouch to work with Gitea, all I had to do was log into my Gitea server, navigate to Settings -> Applications, and create a new application under the Manage OAuth2 Applications section:
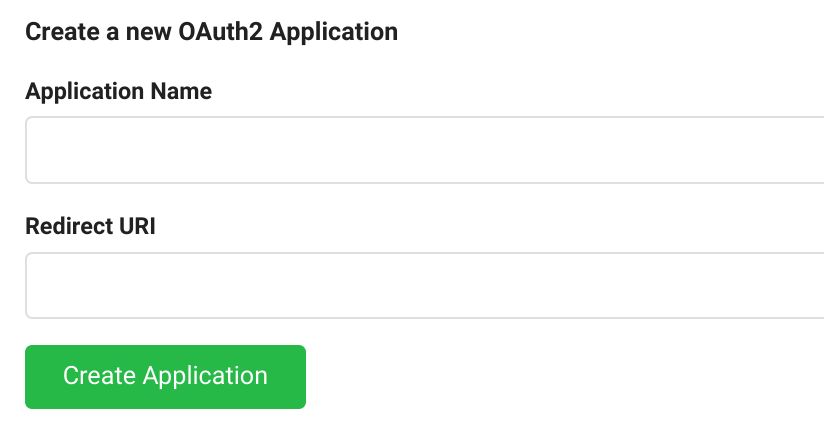
It wasn't immediately obvious what to enter in for the Redirect URI, so I took a guess and entered in https://login.example.com/auth (using my real host name) which turned out to be correct.
Clicking on the Create Application button got me the needed client_id and client_secret values, which I filled into the config.yml file that I created based on the example configuration for Gitea.
Add a Vouch end-point to my VPS
[ Editors Note: An addendum to these configurations was posted on 7/31/2020 ]
As described in my Howto: Building the Site With Drone article, I have a VPS up and running multiple subdomains via the linuxserver/letsencrypt nginx docker image, along with a docker-compose.yml to provide the services that the nginx server acts as a reverse proxy to. Adding a Vouch service was straightforward:
  vouch:
    image: voucher/vouch-proxy
    container_name: vouch
    volumes:
      - vouch:/config
    networks:
      - proxy
    expose:
      - "9090"
    restart: unless-stopped
I copied the config.yml file created above into the vouch volume, and the service was ready to go.
Using the various proxy-confs/<service>.subdomain.conf examples that come with the linuxserver/letsencrypt image as a guide, I created a vouch.subdomain.conf file to add to my nginx site-confs:
server {
    listen 443 ssl http2;
    listen [::]:443 ssl http2;

    server_name login.*;

    include /config/nginx/ssl.conf;

    client_max_body_size 0;

    location / {
        include /config/nginx/proxy.conf;
        resolver 127.0.0.11 valid=30s;
        set $upstream_login vouch;
        proxy_max_temp_file_size 2048m;
        proxy_pass http://$upstream_login:9090;
    }
}
Initially, following along with the Pareki article and the Vouch documentation, I had also included:
    proxy_set_header  Host  login.avocado.lol;
    proxy_set_header  X-Forwarded-Proto https;
However, I found that when I tested https://login.example.com/auth, I encountered an error about there being too many Host headers. I dug into the contents of the /config/nginx/proxy.conf file being included, and realized that file was already setting the Host and X-Forwarded-Proto headers and therfore I did not need to explictly add them to my vouch.subdomain.conf file.
Giving Heimdall Dashboard a Try
Now that I theoretically had a way to use my Gitea server as an OAuth provider to protect a service, I needed something to test it with. I had long been curious about the Heimdall Application Dashboard and since there is a docker image available to use as a service in my docker-compose.yml and a nice heimdall.subdomain.conf.sample file included in the letsencrypt configurations to get me started, I decided that would be a good test site.
The docker-compose service definition was straightforward:
  heimdall:
    image: linuxserver/heimdall
    container_name: heimdall
    environment:
      - PUID=1000
      - PGID=1000
      - TZ=US/Boston
    volumes:
      - heimdall:/config
    networks:
      - proxy
    expose:
      - "80"
      - "443"
    restart: unless-stopped
The final subdomain configuration file that worked for me was: heimdall.subdomain.conf
Initially, I thought to use https://login.example.com/validate as the proxy_pass destination for the /validate definition, but doing so resulted in a 500 error when attempting to navigate to https://start.example.com. I eventually figured out that I needed to use the internal URI within the docker-compose network instead.
Once I had all of the bugs worked out, navigating to https://start.example.com redirected me to login to my Gitea server to authenticate, and once done I was seamlessly redirected back to the Heimdall Application Dashboard.
Experiment: Success!